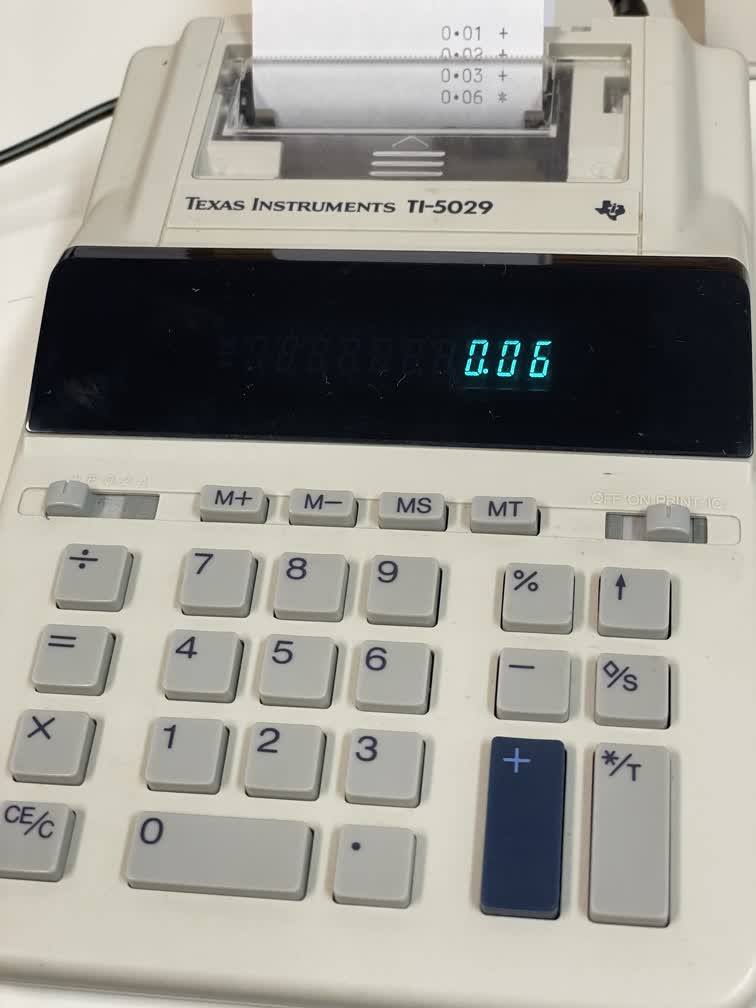
In 2025, I was browsing at my favorite Brooklyn thrift store1 when I came across a 35-year-old printing calculator2. I'm usually pretty good about not hoarding junk these days but for some reason I couldn't resist taking a chance on this particular piece of junk. Once I brought it home, I was able to power it on using the included AC adapter. I felt a tinge of nostalgia as I watched the green vacuum fluorescent display come to life. I don't come across VFDs too often nowadays.
I was excited to try out the printing functionality even though it's not strictly necessary to start using the calculator. The paper roll seems to primarily function as a ledger of prior operations (perhaps for auditing purposes?). Unfortunately, when I tried feeding some paper into it, it wouldn't take. I decided to take it apart to see if I could find the problem.
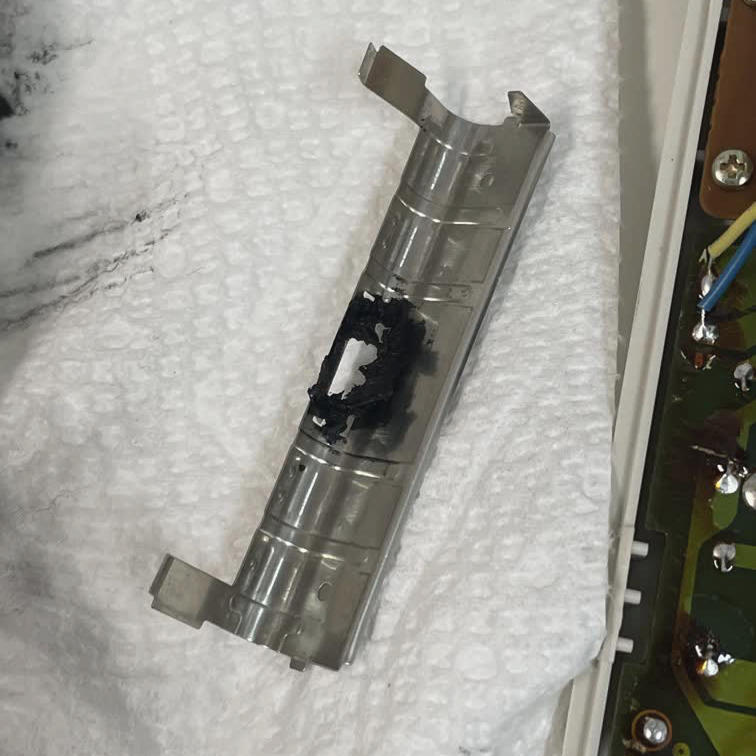
The main enclosure was pretty easy to open up with just a small Philips-head screwdriver. The problem became quite obvious once I was able to visually inspect the underside of the printer module3. Where there should have been a rubber cylinder for grabbing onto the paper, there was just a glob of thick black goo. Huh. I'm guessing the rubber cylinder that was there melted due to prolonged heat exposure at some point in its journey. I ended up taking apart the printer module in order to clean out all the gunk before painstakingly putting it all back together again4.
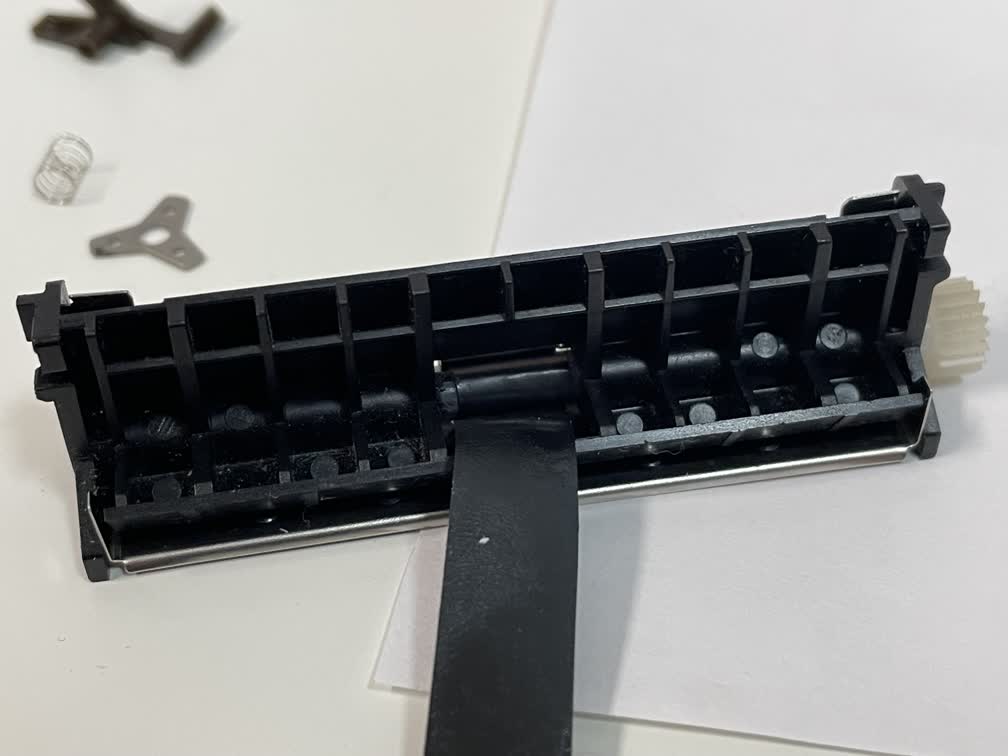
Interestingly, my friend mentioned that they had encountered the same problem in another printer before. Apparently these rubber cylinders melt pretty often! Their solution was to replace the rubber cylinder with heat-shrink tubing, which I thought was pretty clever.
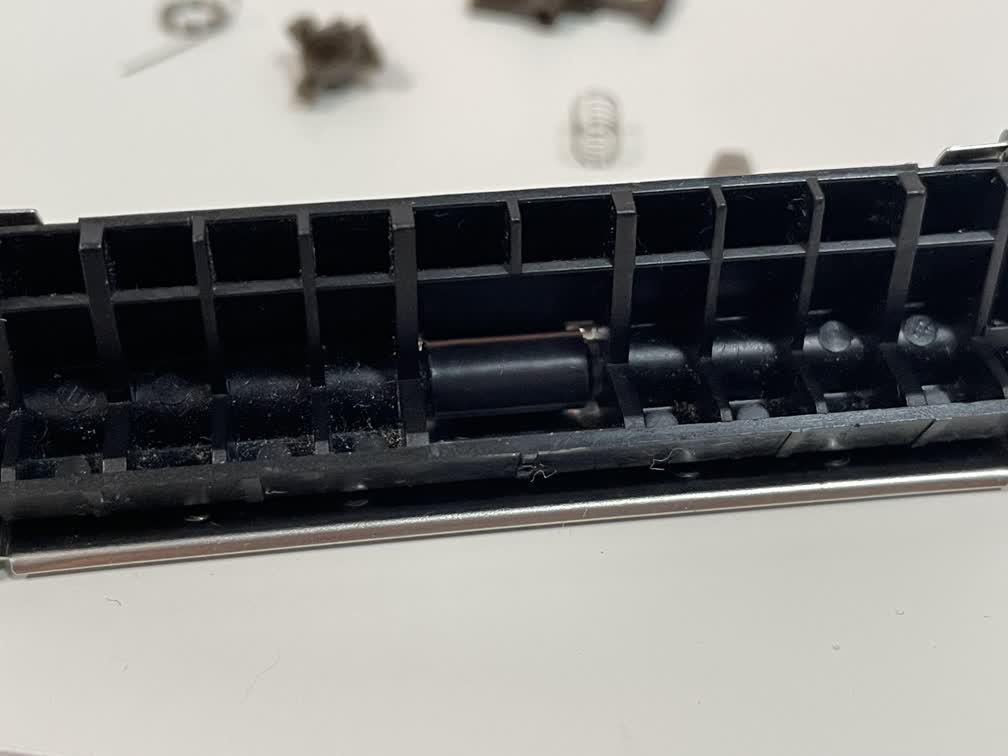
I ended up trying two approaches to replacing the rubber cylinders: heat-shrink tubing and electrical tape. The good news is that both approaches got the printing functionality most of the way back up and running. The bad news is that neither approach worked perfectly for me. In both cases, the traction of the new rubber wasn't quite enough to entirely eliminate slipping, so occasionally the paper wouldn't feed as far as it was supposed to, and the printed lines would overlap as a result. I also tried scoring the new rubber with a craft knife, which seemed to help slightly, but still didn't entirely eliminate slipping.
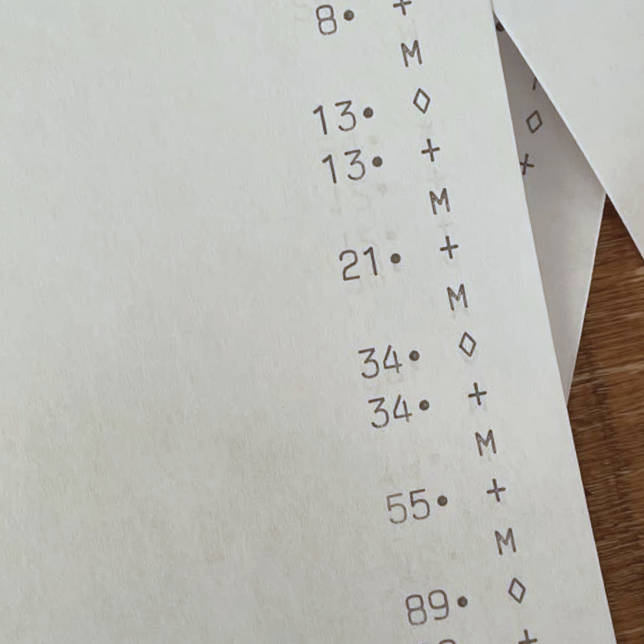
Occasionally the paper feeder worked perfectly, but most of the time it needed some help. In the end, I resorted to lightly pulling on the outgoing end of the paper to guarantee no slipping. For the purposes of demonstrating the printing functionality of the calculator, this was enough for me. It's still cool to see the intended look and feel of the printed output.
Through the process of tearing down and rebuilding this calculator, then familiarizing myself with its archaic features and operation, I gained an appreciation for the human care and attention that went into the design of these old machines, with all its gears and integrated circuits. I hope my story inspires you to peek inside your old broken electronics. You may discover a world long forgotten.

-
To be exact, what I found was a 1990 Texas Instruments TI-5029. I am indebted to the Datamath Calculator Museum for having detailed information on this exact model, among many others. ↩
-
The impact printer module is labeled "Epson Model-41GV". I can't find any information about this part online. ↩
-
In order to get at the metal plate where most of the melted rubber had deposited, I had to remove pretty much every other gear in the system. Disassembly was not hard, but putting it all back together was. It took me about an hour to do it the first time, and my first few attempts were not successful (e.g. upon operation it would jam or fail to carriage return or partially fail in some other strange way) due to some part I hadn't aligned properly. I'm just glad the whole thing was (probably) designed to be assembled more or less with just human hands (except the C-clips, those required pliers). I also appreciated how easy it was to check that I had reassembled it correctly. The entire apparatus is largely controlled by a single motor which I could just turn manually with my finger at a leisurely pace. As someone who typically works on software, it's interesting to be able to debug a physical system with just my hands. ↩